Uploading Files
You can upload files to the Media Pool in different ways.
-
Click > Assets > .
The import overview page will be loaded.
-
Click the button at the top right.
-
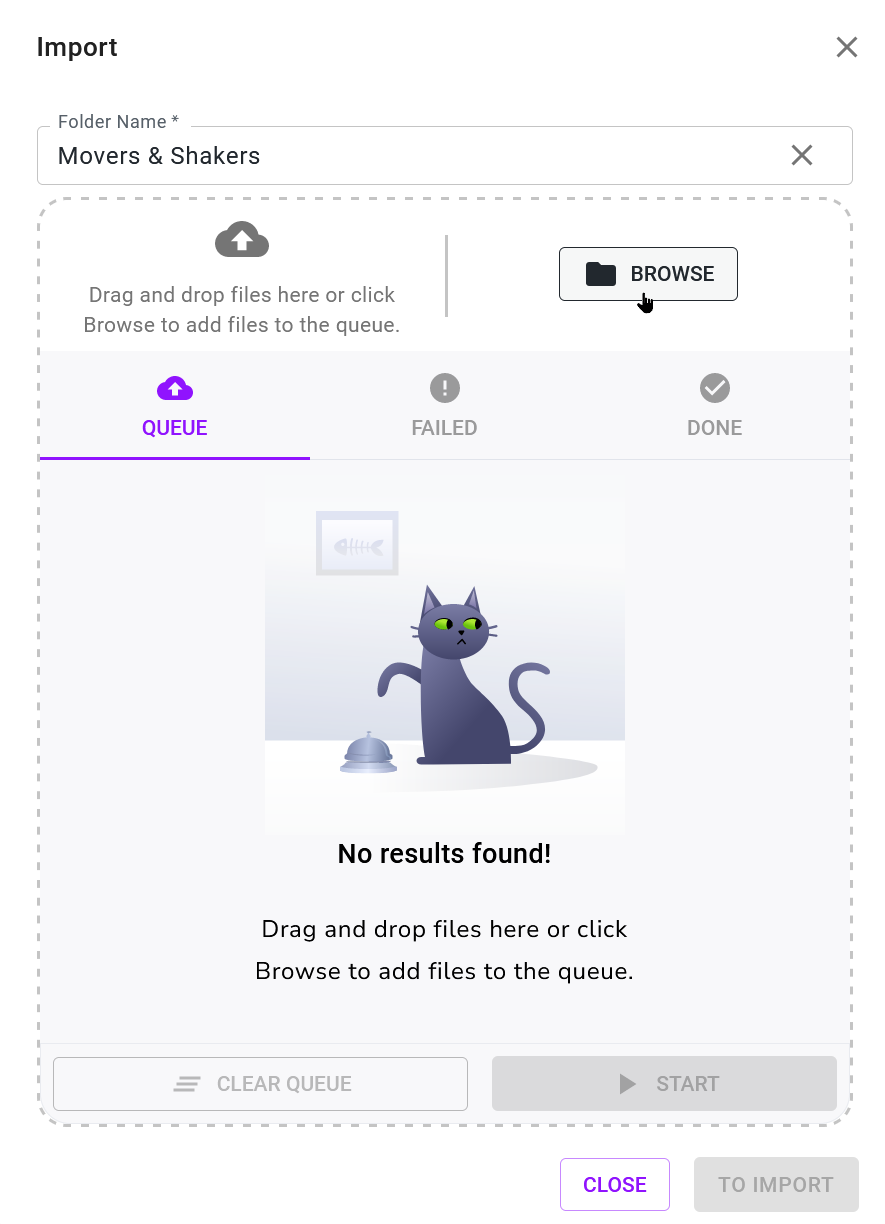
The import dialog is displayed.
-
Enter a name for the import folder in the Folder Name field.
-
Select one of the following options:
-
Add local files to the import dialog using drag-and-drop.
-
Click and select local files.
For PNG, JPEG, BMP or GIF files a small thumbnail is displayed directly after adding them to the queue.
-
To remove accidentally placed individual files from the queue, click ✕ after the file name. To remove all files from the queue, the button is available.
-
-
Click .
The files are uploaded.
-
Once the upload is completed, click .
This opens the import folder.
-
Optional: Click to exit the import dialog. You can edit the required attributes later.
You can add an image from your clipboard directly: Paste screenshots or other images into the Import dialog. First, copy the image with Ctrl + C or Cmd + C, then click in the import window and paste your clipboard content using Ctrl + V or Cmd + V. Enter a name for the import folder and click to complete the upload.
You have uploaded one or more files. In the import folder, select the uploaded assets and switch to the dialog for editing the asset attributes. See Completing the Attributes of an Asset or Completing the Attributes of Multiple Assets One by One.
The drag-and-drop feature streamlines your import process: You can now start imports directly from relevant areas of the Media Pool, without first navigating to the Import page.
-
You can drag and drop files from a local storage medium directly into the import overview or into the of the Media Pool module without having to click the button first.
This saves you steps 1 and 2 of the standard instructions above.
-
In the Folder Name field, type a name for the new import folder.
You can reuse an existing folder name to add additional uploads to that folder.
-
Import folders previously created by you are displayed in a drop-down list by clicking on the Folder Name field.
You can search for folder names you've already used.
-
Select one of the following options:
-
Add local files to the import dialog using drag-and-drop.
-
Click and select local files.
For PNG, JPEG, BMP or GIF files a small thumbnail is displayed directly after adding them to the queue.
-
To remove accidentally placed individual files from the queue, click ✕ after the file name. To remove all files from the queue, the button is available.
-
-
Click .
-
Optional: While the upload is running, you can add more files to the import dialog. To do this, simply drag more files or use the browse button. The additional files are added to the end of the queue and will be processed automatically.
-
Once the upload is completed, click .
This opens the import folder on a separate page.
-
Optional: If you prefer to edit the required attributes later, click to close the import dialog.
Note
You can add an image from your clipboard directly: Paste screenshots or other images into the Import dialog. First, copy the image with Ctrl + C or Cmd + C, then click in the import window and paste your clipboard content using Ctrl + V or Cmd + V. Enter a name for the import folder and click to complete the upload.
You have uploaded one or more files. In the Import folder, select the uploaded assets and switch to the dialog for editing the asset attributes. See Completing the Attributes of an Asset or Completing the Attributes of Multiple Assets One by One.
Before switching to the Import, you can already see why some uploads were unsuccessful on the Failed tab. The number in parentheses indicates the total number of failed file uploads.
-
If the upload is incomplete, open the Failed tab in the import dialog.
-
Move your mouse pointer over the exclamation mark in the red circle next to the file name.
The tooltip shows an initial error description such as "The asset already exists. You cannot upload it twice."
-
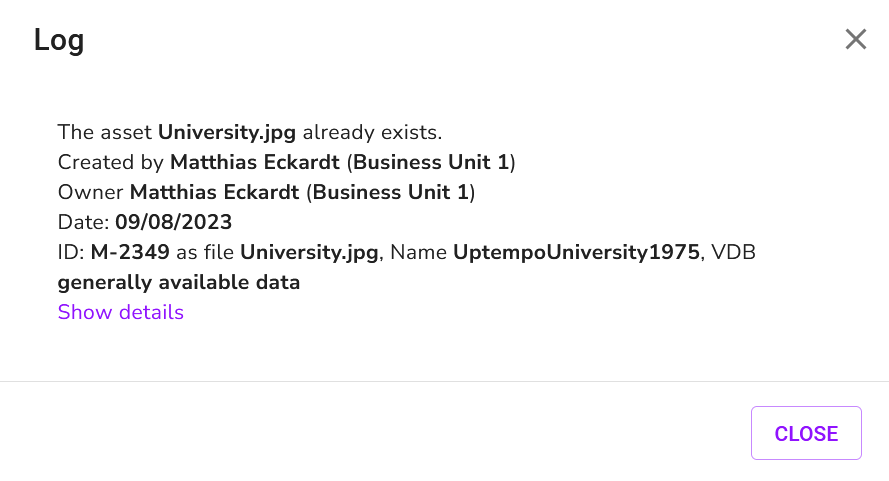
For advanced users: You can view the detailed report (log) after failed uploads in the most recent import folder under the button ⋮ More functions > or for older import folders under ... > .
In the Import folder, you can display a log for missing or incomplete assets after upload errors. You can access this log only after failed uploads or versioning.
-
After a partially successful upload and clicking the command is available under the ⋮ More functions menu button at the top of the Import page.
-
When an upload fails completely, the only way to access the empty import folder is via > Assets > . Then change the filter in the Import toolbar from to to display the empty import folder. You can access the log to the right of the folder name row via > … > .
The log lists problems that occurred during the import process, for example:
-
Detection of duplicate files that already exist as assets. The log provides links to the corresponding assets already in the Media Pool module. If you have the necessary permission, you can open the detailed view of each relevant asset directly.
-
Import of documents with invalid fonts (when font checking is active)
-
Missing linked images in InDesign file uploads
-
Detection of linked images that are duplicates of existing assets
For duplicates that were not uploaded, you can jump directly from the log window to view the existing asset by clicking the provided link.


